Tuesday, December 16, 2008

Scholastics!

Advanced photography students, below is a copy of the pdf that explains the rules and application process for Scholastics. Here are the main points:

Deadlines, (work must be received by

Friday, December 19th ($5 individual artwork, $20 portfolio)
Friday, January 9th ($10 individual artwork, $30 portfolio)

Senior Portfolios
-8 works (300 dpi. -at least 1500 x 2100 pixels) copied to a CD-ROM
file name for each work: Order Number_LastName_FirstInitial_Category_Title or Part of Title.jpg
-2 copies of online registration forms
-artist statement (see specifics in pdf)
-letter of recommendation from teacher/counselor

Individual artworks (Seniors and Juniors)
-work must be 300 dpi. -at least 1500 x 2100 pixels) copied to a CD-ROM
-file name for each work: Order Number_LastName_FirstInitial_Category_Title or Part of Title.jpg

See me if you have any questions! Good luck!

Scholastic application and info

Sunday, December 14, 2008

Liquid Light!


Liquid light is liquid photographic emulsion, the light sensitive silver-halide material you find in traditional black and white photo papers. Liquid light can be applied with a brush or roller to any semi-porous material, (paper, wood, cloth, etc.) transforming non-photosensitive materials into photographic paintings. Simply warm up liquid light in a warm water bath in the darkroom, evenly coat it to your material under red safelights, and let it dry. After it's dried, it can be exposed with negatives or by contact printing with ortho-litho film, and processed with traditional black and white chemistry.

Below is a slideshow of art works made using liquid emulsions. Wood, clothing, paper, and sometimes even other three-dimensional objects have been transformed into photographic painted surfaces!

Tuesday, November 11, 2008

Digital Design


Peer critique!

Use the list below to identify your peer-critique partner. Find their work on flickr, and in the comment section, respond to the following questions:

1)How clearly has this person illustrated their principle of design? What decisions have they made in the presentation to help clarify this principle of design for the viewer?
2)What do you think is especially unique or successful about this person’s work? Be specific!
3)Identify a different classmate’s work in class that you feel is somewhat similar or related to this person’s work. Identify the person, and explain why you think it’s related!


Marian - Katie H.
Leslie - Bianca
Megan - Jemini
Jennifer L. - Lauren K.
Michaela - John
Tracy - Katie L.
Celene - Chris
Kate - Raissa
Amina - Gunter

Sunday, October 26, 2008

A Formal Concern: Design in Presentation

For our third print assignment, we will focus on how the final presentation of a photographic artwork can help communicate an idea. Your final presentation of "A Formal Concern" will need to demonstrate your chosen principle of design, and avoid simply printing two prints and matting them next to one another.

Problem: Create a photographic work that illustrates a principle of design through your choice of subject matter and presentation. Your final work must include imagery from at least two different negatives from "a formal concern" shooting assignment, although you may use more.

We will critique your final presentation (not matted necessarily, but taped together or hung in the style of your choosing) on Thurs. Nov. 6th.

Below I've included a slideshow of photographers who use alternative ways of presenting their work to help communicate an idea or concept. Take a look to help you gather ideas for how you will present yours...

Idea Through Presentation

Monday, October 13, 2008

Cyanotypes!

Welcome to the amazing alternative processes of photography! To begin experimenting with different techniques that can be used to make photographic images, we will be creating cyanotypes, a unique prussian blue print created by the sun!

In order to make cyanotypes, you will first need a variety of imagery to use. This imagery can be combined together to form unique compositions. You will need to create several ortho-litho prints in the darkroom first to be used as contact imagery for your cyanotypes. You may use imagery from any of your negatives from Photo 1 or Photo 2, or you can experiment with photograms or other forms of contact printing.

Take a look at the slideshow below, and consider the different possibilities.


You should create 3-4 ortho-litho prints to begin with. One print should demonstrate darkroom mastery, (wide-range of value, sharp detail, etc.), and the others can be experimental, (consider cropping or using both negative & positive imagery together).

3-4 ortho-litho prints DUE: Wed. 10/22

Thursday, October 9, 2008

A Formal Concern: Shooting Assignment

Imogen Cunningham

Now that you have looked at how the principles of design can be interpreted both formally (composition) and conceptually (idea), it's time to approach subject matter that you're interested in and put these design principles to use.

Shoot one roll of 24 black and white exposures that clearly explore one of the two principles of design you chose to study in your sketchbook. You must demonstrate ways of illustrating this principle of design both formally and conceptually. Apply the photographic principles of composition, (fill the frame, edges of the frame, rule of thirds, leading lines, etc.) to guide your compositions. Consider technical aspects as well, such as lighting, bracketing (when necessary), and depth of field/shutter speed. Choose a subject that's interesting and unique to you, (portraiture, landscape, interiors, etc.)

One roll of film and contact sheet DUE: Tuesday, 10/21

Monday, October 6, 2008

A Formal Concern: Sketchbook brainstorming

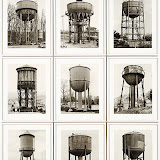
work by: Bernd & Hilla Becher
James Welling
Minor White

For our next shooting assignment, we will redirect our attention to a formal concern, namely, the use of principles of design and composition within photography. We will revisit the principles of design throughout the year, but to start I would like you to choose two of the following design principles to focus on for your next shooting assignment:

Balance
Repetition
Pattern
Emphasis
Contrast
Movement
Unity

After you have chosen two, create a one page homage to each principle of design in your sketchbook. You may use more than one page if you'd like. Each homage must include the following:

1) Definitions-write out at least two ways this design principle could be defined. One definition should pertain to how this principle might appear in the composition of an artwork, and the other definition should be how this principle may be illustrated as a concept, metaphor, or what it means to you personally. Use a dictionary to look up different definitions!

2) 3 Master Photographer examples. Use the links below to do a little research. Find three different master photographs that somehow illustrate both definitions for each design principle. Include the photographer's name, the title of the work, and the date.

Photography NOW
Masters of Photography
ProFotos-Photography Masters
Photokaboom

3) Brainstorm and illustrate at least three different ways you could illustrate this design principle with your own photography, using subject matter and concepts you're interested in. Don't worry about what's possible or impossible at the moment, just come up with different approaches.

SKETCHBOOK DUE: Fri, Oct. 10th.

Wednesday, September 17, 2008

Crop and Enlarge-it!


It's always important to push the limits as an artist. As photographers, it's important to experience and understand the limits of your medium, 35mm film. Sometimes when we push the limits, we venture into new and exciting territory!

Over the next several days as you work on your shooting assignment outside of class, I would like you to use the large adjustable print easels in the darkroom to both enlarge and crop sections of chosen negatives to then be combined into an elegant abstraction. By doing this, you will practice using a new print easel, as well as see how large you can push sections of a 35mm negative.

Each "cropped" section of your old exposure should be enlarged to at least three times it's normal size so that you can see the "grain" of your film.

You may crop sections of your old negatives into any shaped format of your choice; square, rectangle, long, short, etc. Discover all the cropping possibilities you have with these print easels!

Your final recombined design should use at least 5 images from at least two different negatives or more. Consider using related subject matter so that your design is visually logical.

Consider creating both negative and positive images from negatives of cropped sections and/or by making contact prints.

You will matte your final recombined design for your portfolio!

Critique on recombined design on Fri. 9/26

Monday, September 15, 2008

Homework #6: Comment & Critique (10 points)

Raissa Rosenbaum

For homework log onto flickr and look at the Learning to Love You More prompts of your partner (partners are listed below).

Leave comments (both praise and critique) that utilize appropriate photographic terminology in the comment section under the 2 or 3 images that you choose to select. Remember what the prompt was and how they answered the question

If you would like to leave comments for others in the group while you sift through the classwork than feel free...try to perhaps get used to using this like an on-line learning class. We will be working to leave constructive criticism on the site in the future!!!

The pairs are pre-selected and are as follows:
Amina M. <-> Marian A.
Leslie B. <-> Jemini P.
Kate Y. <-> Jennifer L.
Raissa R. <-> Tracy L.
John K. <-> Krisy K.

Passion H. <-> Lauren K.
Bianca M. <-> Celene M.
Megan C. <-> Amanda S.
Michaela J. <-> Katie L.
Katie H. <-> Gunter O.
Chris R. -> Kyria G. -> Carolyn S.

Wednesday, September 10, 2008

Homework #5: Contradict & Juxtapose

For our new shooting assignment we will be focusing on an idea very common in photography, contradiction and juxtaposition.

Contradiction (noun)-a combination of statements, ideas, or features of a situation that are opposed to one another.

Juxtaposition (noun)-to place or deal with close together for contrasting effect.

This assignment will be broken into two parts:

1) Sketchbook analysis-Select two examples from the slideshow below to print and glue into your sketchbook. Label each example with the artist's name and title. Then respond to the following questions for each work:

-What are the two elements that are visually being juxtaposed to create this visual contradiction?
-What emotion or idea do you feel the artist is trying to convey through this unexpected contrast? (Defend your response by citing specific evidence you see in the work!)


2) Sketchbook Brainstorming

In the style of a visual journal in your sketchbook, Find or create examples that are opposite or contradict one another. Create a two page layout in homage to your opposing forces!!! Please remember that the two page design and layout should utilize the same elements and principles that you have come to know well in making photographs visually dynamic! Any media is fair game...remember that if you are using images that you should cut/crop them to insure that you are making them your own (no full magazine images that are just glued in!). See examples below!

When creating your "homage," consider the following:
-What ironies or contradictions do you find in the news or media?
-What contradicitions do you see or find in friends or people around you?
-Think opposing forces! What opposites could be placed next to each other that would be ironic or surprising?


Chris Rhodes


Katie Lozupone

Sunday, September 7, 2008

Homework #4: Love Everyone More

Clockwise from top to center: Julie Ogden, Liz Rench, Wenjei Cheng, Lauren G, Sarah Reid

This assignment is inspired by the artist Miranda July, who over a decade has strived to create works of art that connect people in unexpected and beautiful ways. Her website project, Learning to Love You More is full of assignments she gives to the public or anyone who visits the site to perform and post in order to provide a way for people to meet, see, and hear each other's stories.

As we begin the year, we too will spend time getting to know one another, and each other's interests and styles. Follow these directions:
1) Visit July's website here: Learning to Love You More
2) Choose five of the following assignments to complete, by carefully following July's instructions:
9. Draw a constellation from someone's freckles.
no. 11. Photograph a scar and write about it.
no. 23. Recreate this snapshot.
no. 27. Take a picture of the sun.
no. 30. Take a picture of strangers holding hands.
no. 50. Take a flash photo under your bed.
no. 55. Photograph a significant outfit.
no. 63. Make an encouraging banner.

3)Use a camera that instantly takes pictures for this assignment, no film processing necessary! Digital cameras and polaroids work great! Remember to use proper lighting and shutter speeds where necessary.

4)Upload your pictures onto your Flickr portfolio,label and add descriptions to each of your images.

5)Batch / group them together as the "Learning To Love You More Collection" We will be commenting on each others images on-line!

6) The final shots are due on Friday, Sept.12th.

Thursday, September 4, 2008

Homework #3: Create a Flickr account!

Hey everyone,
To get your online portfolio up and ready, you need to create a Flickr account. This portfolio will be the place we use to view your portfolio effortlessly, occasionally critique your peers, and use as a reference for scholarship applications and contests. It's invaluable as an artist to have an accessible portfolio!

Here's what you need to do:

1) Visit Flickr by clicking the link on the right under "Photo Links"
2) Create a Yahoo account name and password, (if you don't have one already).
3) Create a Flickr account name- it must include your first initial and last name, no nicknames or other cryptic references! Note, your Flickr account name does not need to match your Yahoo account name!
4) Once you've created your account, join "Advanced Photography" by searching for it as a group. Agree to the three rules for joining.
5) You will receive notification from me that you're in the group. Once you're in, respond to my group posting by sending me a friendly message. While you're at it, create an appropriate "buddy icon" as a simple identity.

You will not receive the 10 point credit until you've sent me a message that you're officially in the group!

Good luck!

Thursday, August 28, 2008

Homework #2: "I'm a Photographer..."

Create a minimum 2 page sketchbook entry in the style of a visual journal that illustrates what you feel is most important for being a photographer, in the form of a personal map or journey. Your entry must be well designed (elegantly uses the entire space of two pages), organized, legible, and be thematic, (see below). This entry should visually set the tone for the rest of your sketchbook entries. Make it your own and use lots of visual examples!

See handout below for additional requirements.

Use links below to help you find examples of master photographer works:

Photography NOW
Masters of Photography
ProFotos-Photography Masters
Photokaboom

Shooting Assignment #1: Show Me How You Shoot!


Now that we're back into the swing of things, and you've had the whole summer to space out, it's time to jump back in to photography! Regardless of whether you've been taking pictures over the summer or not, it's time to brush the cobwebs aside and shoot a roll of film (or two). Here's what I'd like you to do:

Problem: Shoot a roll of film (24 exposures minimum, b&w only) that demonstrates how you approach your choice of subject matter with a camera. Choose only one subject to focus on, and concentrate on your style of approaching this subject by considering the following:

1) How do you employ compositional strategies like cropping or using the edges of the frame?
2) How do you use light and shadow?
3) How do you use technical adjustments like focus, depth of field, or shutter speed?
4) How do you employ a point of view?


Be prepared to have the following completed for our critique on Thursday, 9/11:
-Two 5x7" or larger prints
-Contact sheet and negatives
-Self evaluation questions (see second page below)

Read this document on Scribd: Show Me How You Shoot critique sheet

Sunday, August 24, 2008

Welcome Back!


Hello everyone,
Welcome back to photography! Hopefully you all had a safe, relaxing, restful summer, and are ready to dive back in again. This is Reservoir High School's Photo 2 class blog! This blog will be a resource for both parents and students to contact me, keep track of assignments and due dates, as well as review the artworks and ideas we looked at and discuss in Photo 2.

It will also serve as an online calendar and blackboard, listing all homework and classwork assignments, as well as providing resources to help you generate ideas and help you along. Keep this site bookmarked in your web browser, and check in often to see what's going on in Photo 2!

This blog will also be connected to Reservoir's official Visual Art department's website, which you can access currently at: http://web.mac.com/gregenglish/RHS/RHS_Art_Dept..html (see link at right)
Please feel free to email me with any questions at evan_lalonde@hcpss.org

I'm excited about this blog, and hope that it will provide you with yet another way of improving and creating your work!

Homework #1: Syllabus and Contract

It's important to know the rules and rights you have as a student in my Photo 2 class. Below is an online copy of the Photo 2 syllabus that you can access at any point, just click on the iPaper icon to read, download, or print this document.

I will give you a copy of the syllabus in class so that we can read over it together, but your assignment is as follows:

1) Read over entire syllabus with your parent or guardian.
2) Fill in all required student information on contract, and sign.
3) Have parent/guardian sign contract on back, please note the "publication notice" on the bottom.
4) Tear off contract and turn in to me by Friday, August 29th.
5) Store syllabus in safe place.

Read this document on Scribd: Photo2syllubus2007-08